
Why Switching to Ios Wallet Makes Your Life Easier
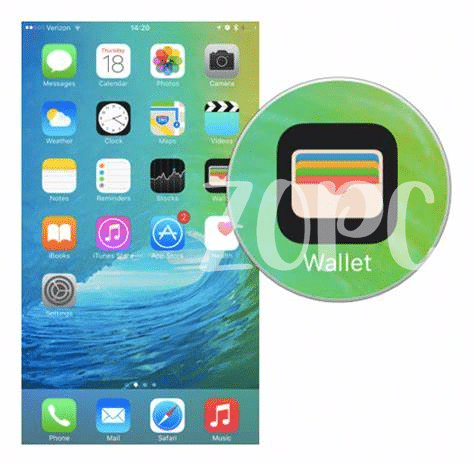
Imagine a world where your bulky wallet is a thing of the past, replaced by something sleek, simple, and secure — right on your iPhone. That’s what the iOS Wallet brings to the table, offering a neat way to keep your cards, tickets, and more in one place. 📲 No more digging through your bag for that coffee shop loyalty card or panicking about where you put your concert tickets. With just a few taps, everything you need is at your fingertips, safely stored and easily accessible. Plus, it’s not just about convenience; it’s also about security. 💳🔒 Your information is protected, and you can even track your spending more easily. Say goodbye to the hassle of a traditional wallet and hello to a streamlined, stress-free pocket companion.
| Feature | Benefit |
|---|---|
| Convenience | Everything at your fingertips |
| Security | Your information is protected |
| Simplified Tracking | Easily monitor spending |
Preparing Your Old Wallet: What You Need to Know
Before you dive into the world of iOS Wallet, taking a moment to get your old wallet ready can be like setting the stage for a smooth magic trick 🎩✨. Think of it as making sure you’ve got all your ducks in a row 🦆—gather your cards, be they credit, debit, or loyalty cards, and make note of any important information. It’s a bit like going on a treasure hunt, finding all the pieces you need to bring into your new, sleek digital wallet. Also, it’s the perfect time for a little digital housekeeping – remove any cards or details you no longer use or need. This step isn’t just about moving things over, it’s about starting fresh and organized. And for an added flair, here’s a neat trick for your MacBook, found at https://iosbestapps.com/maximizing-your-macbooks-performance-with-dollar-store-finds to make the most out of your Apple ecosystem.
The Step-by-step Migration Process to Ios Wallet
Migrating your digital life to iOS Wallet is like moving into a new digital home 🏡- exciting but a bit daunting! Start with downloading the iOS Wallet app. Next, gather all the cards and passes from your current wallet – think loyalty cards, debit/credit cards, and even your movie tickets 🎟️. With everything in one place, adding them to your iOS Wallet is a breeze. Just follow the app’s instructions to scan or enter the details of each item. Voila! You’re set up for a simpler, more organized life with everything just a tap away. Remember, patience is key to a smooth transition. 🌈
Verifying Your Information: a Crucial Step

Once you’ve decided to make the switch to iOS Wallet, it’s like stepping into a world where your phone gets to carry all your essentials, from credit cards to tickets 🎟️. But, before diving into this convenience, there’s a very important step you shouldn’t skip – making sure all your information checks out. Think of it as confirming your identity at the door before entering an exclusive event. This means double-checking that the details on your cards and documents match up exactly with what you input. Mistakes here could mean a snag in using your wallet later.
Now, if you’re also looking to up your game on your devices, there’s a cool tool you might want to check out. Whether you’re into gaming or just want a slick app experience, ipad talkie app is something to explore. After you’ve verified your information and are all set up, customizing your iOS Wallet lets you tailor it to fit your lifestyle perfectly, ensuring you’re getting the most out of it. Remember, a smooth verification leads to a seamless experience, making every tap or scan a breeze 💨.
Customizing Your Ios Wallet for Maximum Benefit
After you’ve jumped into the world of iOS Wallet, you’re ready for the fun part: making it truly yours 🌟. Think of it as decorating your digital room – where each detail matters. Start with setting up your favorite cards for seamless payments. Just like how you arrange your physical wallet with the most-used cards at the front, do the same here. Then, dive into notifications. Want to keep tabs on your spending without being flooded by alerts? No problem. You can choose which updates you get, making sure you’re in the loop, but not overwhelmed 🔄. Don’t forget to explore the passes and tickets section! Whether it’s boarding passes for your next adventure or tickets to your favorite band, having them a tap away feels like having a magic box in your pocket. Customizing is not just about convenience; it’s about fitting this powerful tool into your lifestyle, effortlessly.
| Customization Feature | Benefits |
|---|---|
| Favorite Cards | Quick access to frequently used cards |
| Notifications | Control over what updates you receive |
| Passes & Tickets | Easy access to boarding passes and event tickets |
Solving Common Problems after Switching to Ios Wallet
Switching over to a new tech toy like iOS Wallet can sometimes feel like you’re trying to solve a puzzle 🧩, but with a few tips, those pieces can fall right into place. Sometimes, cards might not add correctly, or notifications aren’t popping up as they should. The trick is not to panic. Check your settings to make sure everything’s turned on and set up exactly how you like it. If something’s not adding up, a quick visit to the official support page can often shine a light on the solution.
For those moments when you’re feeling stuck, remember there’s always a hack or two out there to get you back on track. If your app is acting up, try removing and re-adding your card or turning your phone off and on again. Sounds simple, right? It often is! And for those wanting to get the most out of their setup, including snagging the best apps, check out macbook coin master best app. This will get you sorted with top-notch recommendations, ensuring you’re optimizing your wallet to its fullest potential 🚀👍.