
Exploring the Basics: What Is Venmo on Imac?
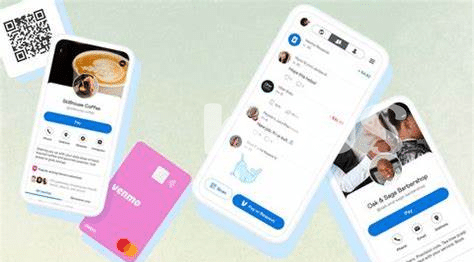
Imagine turning your iMac into a mini-bank, where sending and receiving money is as easy as sending a text 📱. That’s what Venmo does! It’s an app that lets you pay your friends or receive money from them, right from your iMac. Think of it as having your wallet, but digital. 🎉 Whether you’re splitting dinner bills, paying rent, or just sending a birthday gift to a friend, Venmo makes these transactions simple and fun. What’s even cooler is how it turns money exchange into a social experience. You can add notes, emojis, or even memes to your payments, making it a unique way to connect with friends. Let’s dive deeper into how Venmo can transform your iMac into a social payment hub.
| Feature | Description |
|---|---|
| Send & Receive Money | Effortlessly manage transactions between friends and family. |
| Social Interactions | Add fun notes and emojis to payments, making each transaction unique. |
Getting Started: Downloading and Installing Venmo
Embarking on your Venmo journey on your iMac starts with a simple download and installation process. Imagine it as setting up your new digital piggy bank 🐖, where sending money to friends or family becomes as easy as sending a text message. First, dive into the App Store, search for Venmo, and click ‘Get’. It’s like hunting for treasure, but in this case, the treasure is a super convenient app that sits right on your desktop. Follow the on-screen prompts, and before you know it, you’ll be on the doorstep of seamless transactions.
Once you’ve clicked download, a progress bar appears, eagerly filling up to bring you closer to completing your financial toolkit. This step is your gateway to a world where paying back for last night’s dinner or splitting rent is as hassle-free as pie 🥧. But remember, the adventure doesn’t stop here. After installation, you’ll enter the realm of setting up your account and discovering the joys of quick and social payments. Also, don’t forget to explore other great app finds like those on https://iosbestapps.com/top-10-must-have-macbook-zedge-app-features to enhance your iMac experience.
Creating Your Account: a Step-by-step Guide

Starting your journey with Venmo on your iMac is like unlocking a new level in the game of easy and fun payments 🚀. First, you’ll visit the Venmo website or the App Store to get the app. Next up, you click “sign up” to kick things off. You’ll enter some basic info like your name, email, and a secure password. Make sure your password is like a secret handshake – only you know it! 🤫 Then, you’ll verify your phone number because Venmo uses it to keep your account safe. Just like that, you’re ready to dive into the world of sending and receiving money with a click. Welcome aboard! 🎉
Adding Friends: Making the Most of Social Payments

Once you’ve set up your account, it’s time to start adding friends so you can easily split dinner bills, send birthday cash, or simply pay back what you owe from last weekend’s outing 🎉. Think of it as your digital wallet that keeps all your social payments in check. It’s pretty straightforward – all you need is your friend’s username, phone number, or email associated with their account. With just a few clicks, they’re added to your network, ready for any money exchanges that come your way.
Speaking of staying connected, sometimes learning and sharing go hand in hand. Whether it’s sharing that neat trick you discovered on how to send money with a GIF or understanding the nuances of managing transactions in a foreign language, resources like ios bed bath and beyond can be incredibly helpful. Remember, the more friends you add, the easier it becomes to manage group expenses for trips or nights out 🚗💨. So, dive in, and let the digital era make your financial interactions smoother than ever.
Managing Your Money: Sending and Receiving Funds
Once you’ve set up your Venmo on your iMac, it becomes super simple to manage your money 💸. Think of Venmo as your digital wallet that lets you send money to friends or receive cash whenever you split a bill or share expenses. You just need the person’s username, phone number, or email, and voila, money moves!
Here’s a little table to help make sense of it all:
| Action | What You Need | How It Helps |
| Sending Money | Friend’s Username, Phone, or Email | Pay or Split Bills Easily |
| Receiving Money | Your Venmo Info | Get Paid Back or Collect Funds |
Not only is this super handy for tracking who owes what 📊, but it ensures you can always stay on top of your finances, whether you’re chipping in for a gift or splitting the dinner bill. Dive into this feature with confidence, and you’ll see how effortless it makes every transaction.
Tips and Tricks: Enhancing Your Venmo Experience
Taking your Venmo experience to the next level doesn’t have to be a chore. By tweaking a few settings and adopting some smart habits, you can turn this popular payment app into an even more powerful tool. For starters, always review your privacy settings to control who sees your transactions – a must for keeping your finances personal. Don’t underestimate the power of emojis 🚀💸; they’re not just for fun. Using them can help you quickly identify different types of expenses or payments at a glance. Also, did you know you can sync Venmo with other apps to streamline your online conversations and transactions? If you’re looking to enhance your messaging experience on your Mac, check out ipad chat best app, which seamlessly integrates with your Venmo account for easier access and sharing during chats. Embrace these small changes, and you’ll see just how much smoother and enjoyable your Venmo experience can become.